

School is in and running and I am loving it! I am sharing a tutorial on how to make these easy velcro bags for you to put your kids’ school stuff in, use as gift bags, etc.
I love shopping at The Ribbon Retreat because the selection of darling ribbons, embellishments, trims, and fabric is awesome. I found this cute fabric and all the embellishments there for a great deal. And of course, this is where I got my VELCRO!
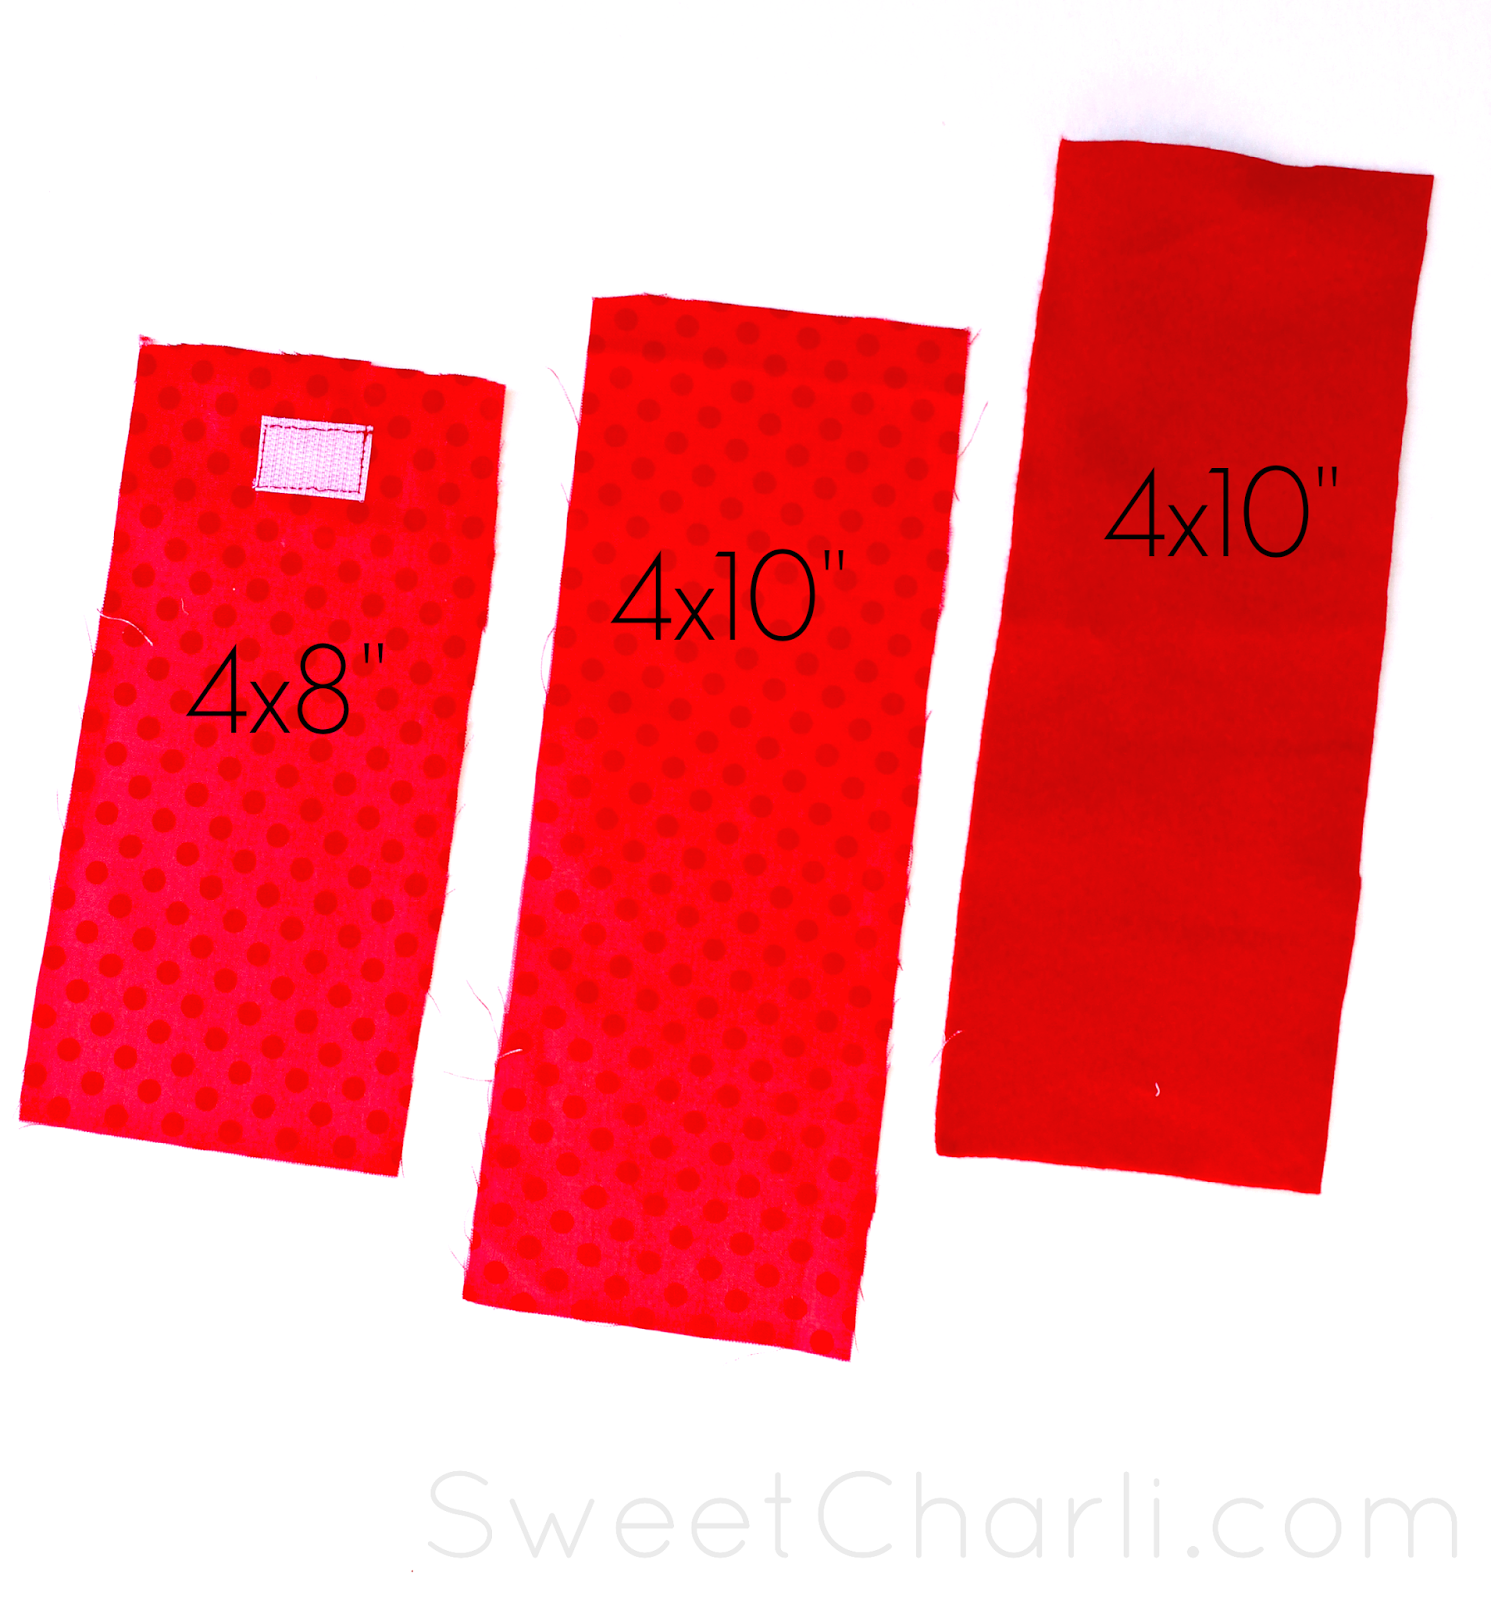
To make this VELCRO pencil bag you will need:
4×8″ fabric
4×10″ fabric
4×10″ felt
sticky velcro
sewing machine/thread
embellishments
I use felt on the bottom of my bag so that it has stability while carrying the pencils.
Sew a rough piece of velcro on the top-middle of your 4×8″ fabric.
Next, on the 4×8″ fabric piece, fold over the top two times then stitch a straight line across to hold and finish it
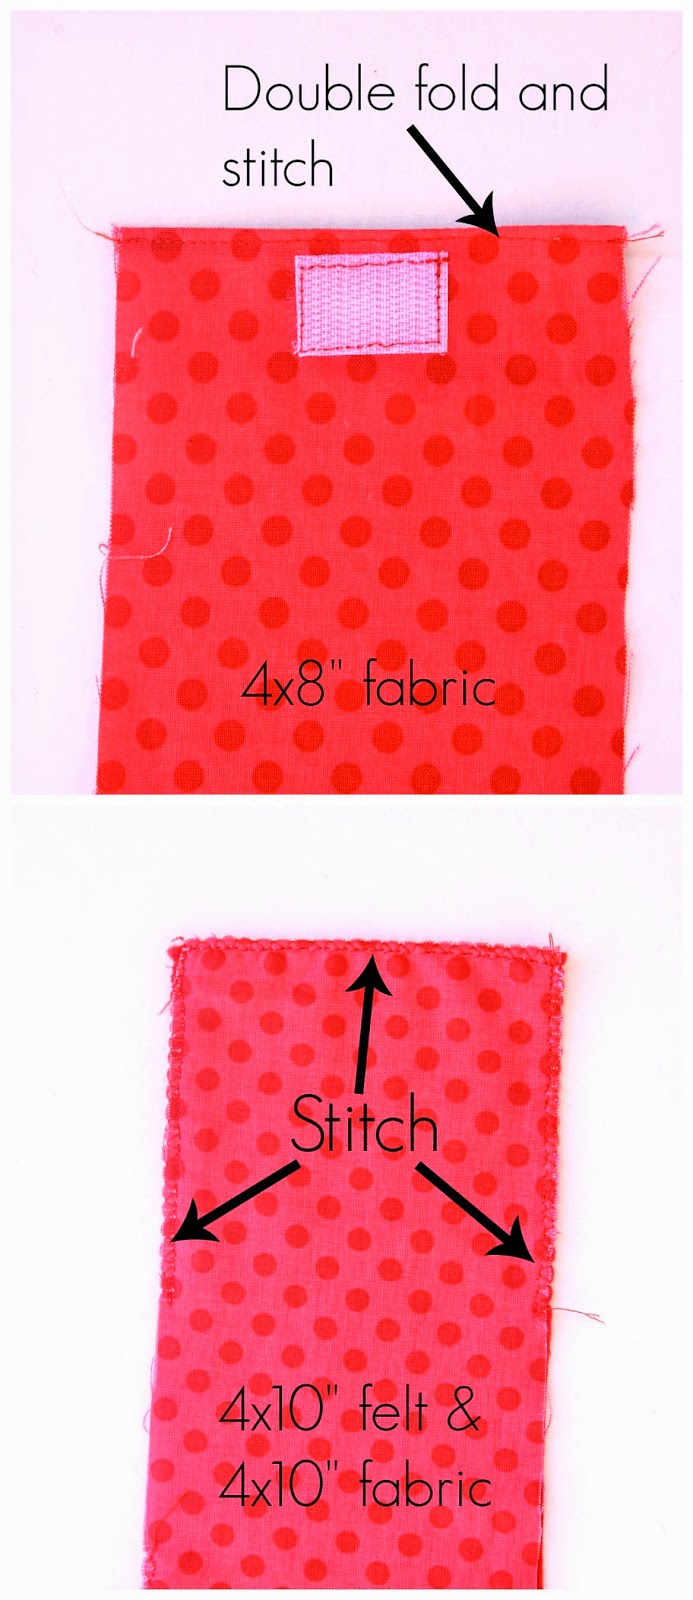
Then you will place your 4×10″ pieces of felt and fabric together (wrong sides together) and use a non-fray stitch around the top half (you can around the whole thing but it isn’t necessary).
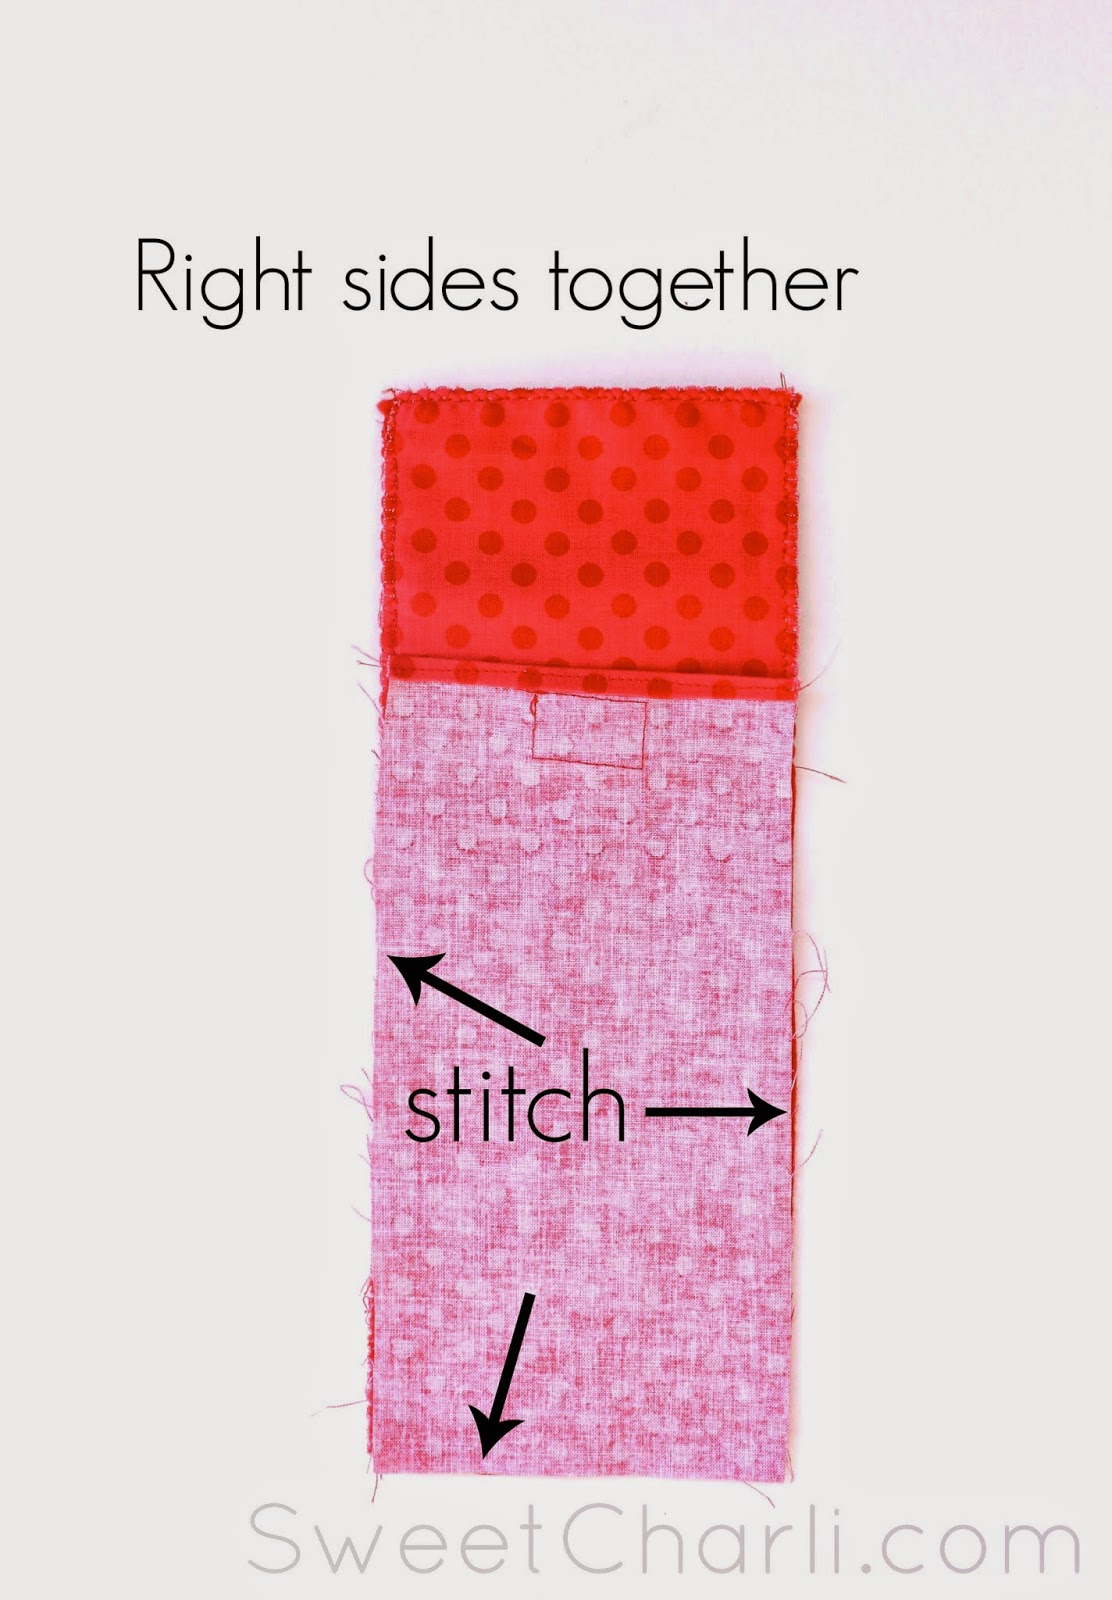
Now you will place the two pieces together, right sides touching. Line up from the bottom because you will want the longer piece to be on top for the flap.
Sew around the two sides and the bottom.
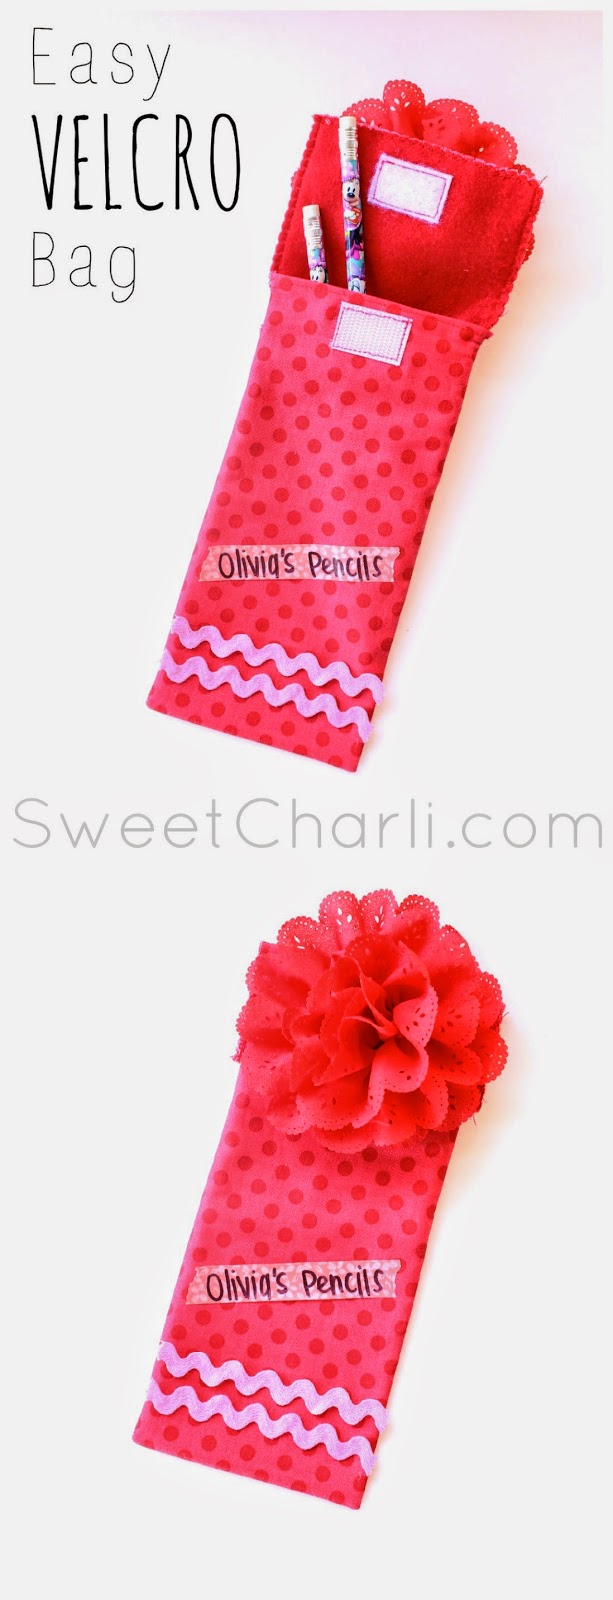
Flip right side out. Add the soft piece of velcro on the flap of your bag.

Now is the fun part, embellishing! I found so many cute things at The Ribbon Retreat to embellish with! Ric-rac, flowers, bows, washi-tape, ribbons…it was hard to decide what to use!

I kept on going and wanted to make a sandwich bag for lunch. I used oil cloth for the outside, and fabric for the inside.

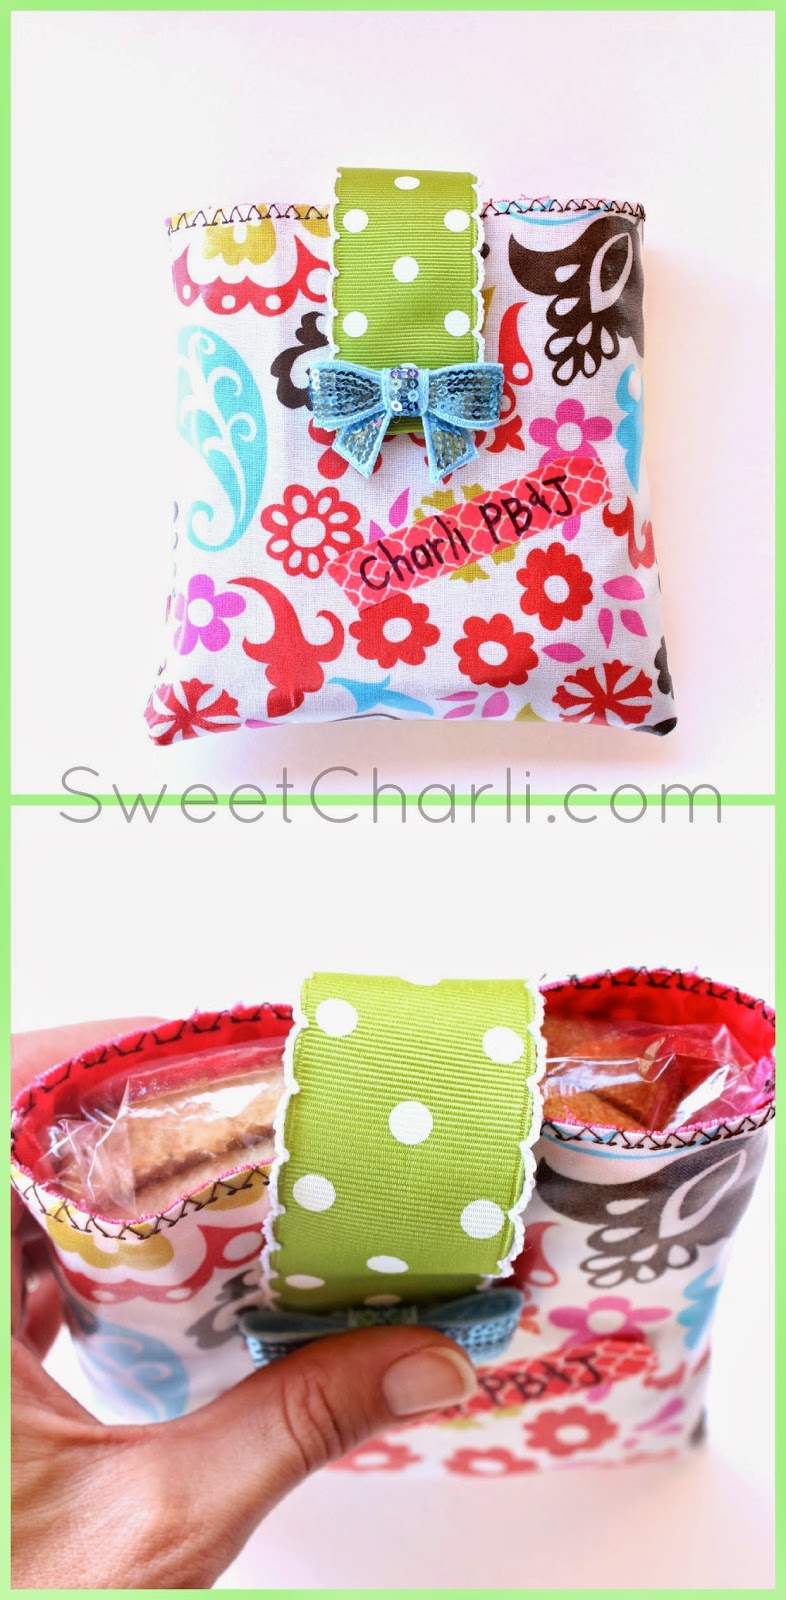
One of my favorite things about this project are the labels. I got some fun washi-tape from The Ribbon Retreat and decided that these labels can be removed and replaced with whatever I want to say! How easy and fun is that?

I hope you enjoy this project. These VELCRO bags really are so easy to make and you can put anything in them! They would make fun bags to give gifts in too!
Happy “V” Day!
Here is another easy bag to make.


So cute! You are a talented Mama. I especially like the reusable sandwich bag.
How cute is this?! And the step-by-step photos are awesome. Pinned!
Super cute!
Flip Flap Bag Sewing
[…] use felt on the bottom of my bag so that it has stability while carrying the pen […]
Sweet Retreat Purse Sewing Pattern
[…] se felt on the bottom of my bag so that it has stability while carrying the penc […]
Flip Flap Bag Sewing
[…] e felt on the bottom of my bag so that it has stability while carrying the penci […]
Sweet Retreat Purse Sewing Pattern
[…] elt on the bottom of my bag so that it has stability while carrying the pencils. […]