


Lets continue my obsession with bows, shall we? I love the traditional bow and you will see them in my girls’ hair, on our clothing, and even on my blog’s logo! This bow shirt is really easy; trust me when I say, “I am not an expert sewer”! Honestly, if I can make this – you can too {if you have a sewing machine!} Lets get started…
You will need a plain tee, and a little fabric. Whenever I am adding fabric to a shirt I like to use fabric from existing shirts/clothing. Did you know that I go to my local thrift store for fabric actually more than I go to the fabric store? There is more variety in prints and its definitely cheaper! Also, if you are using fabric from a pre-existing shirt or knit fabric, it washes up nicely without wrinkling!
The polka dot fabric I used for this bow shirt actually came from a shirt in my own closet and I was going to get rid of it but I thought I would reuse it instead! My daughter is 4 so for this I cut a piece that measured 16.6″x10″ and a smaller piece 7″x3″.

With the larger piece of fabric, fold it in half long ways with the right sides touching and then stitch up the side. Turn it right side out and then stitch the two ends together with the seams on the outside (right sides together). Turn right side out and you have what looks like a headband { but its not 😉 }
 Take your smaller piece and do the same thing with it except you won’t sew the two ends together. Just make a tube like pictured below in first picture. Then, you will find the center of your shirt horizontally and position where you want it vertically and pin. Sew it onto the shirt where the arrow is pointing on the first picture below and make sure the seam of the tube is facing upright.
Next, take your large headband-like piece and make the bow. This is done by folding it like you would fold a paper fan. Set it on top of the long tube you just sewed on your shirt and measure how big the hole needs to be by pinning the tube around the bow and onto the shirt. Take the bow out then stitch where you pinned.
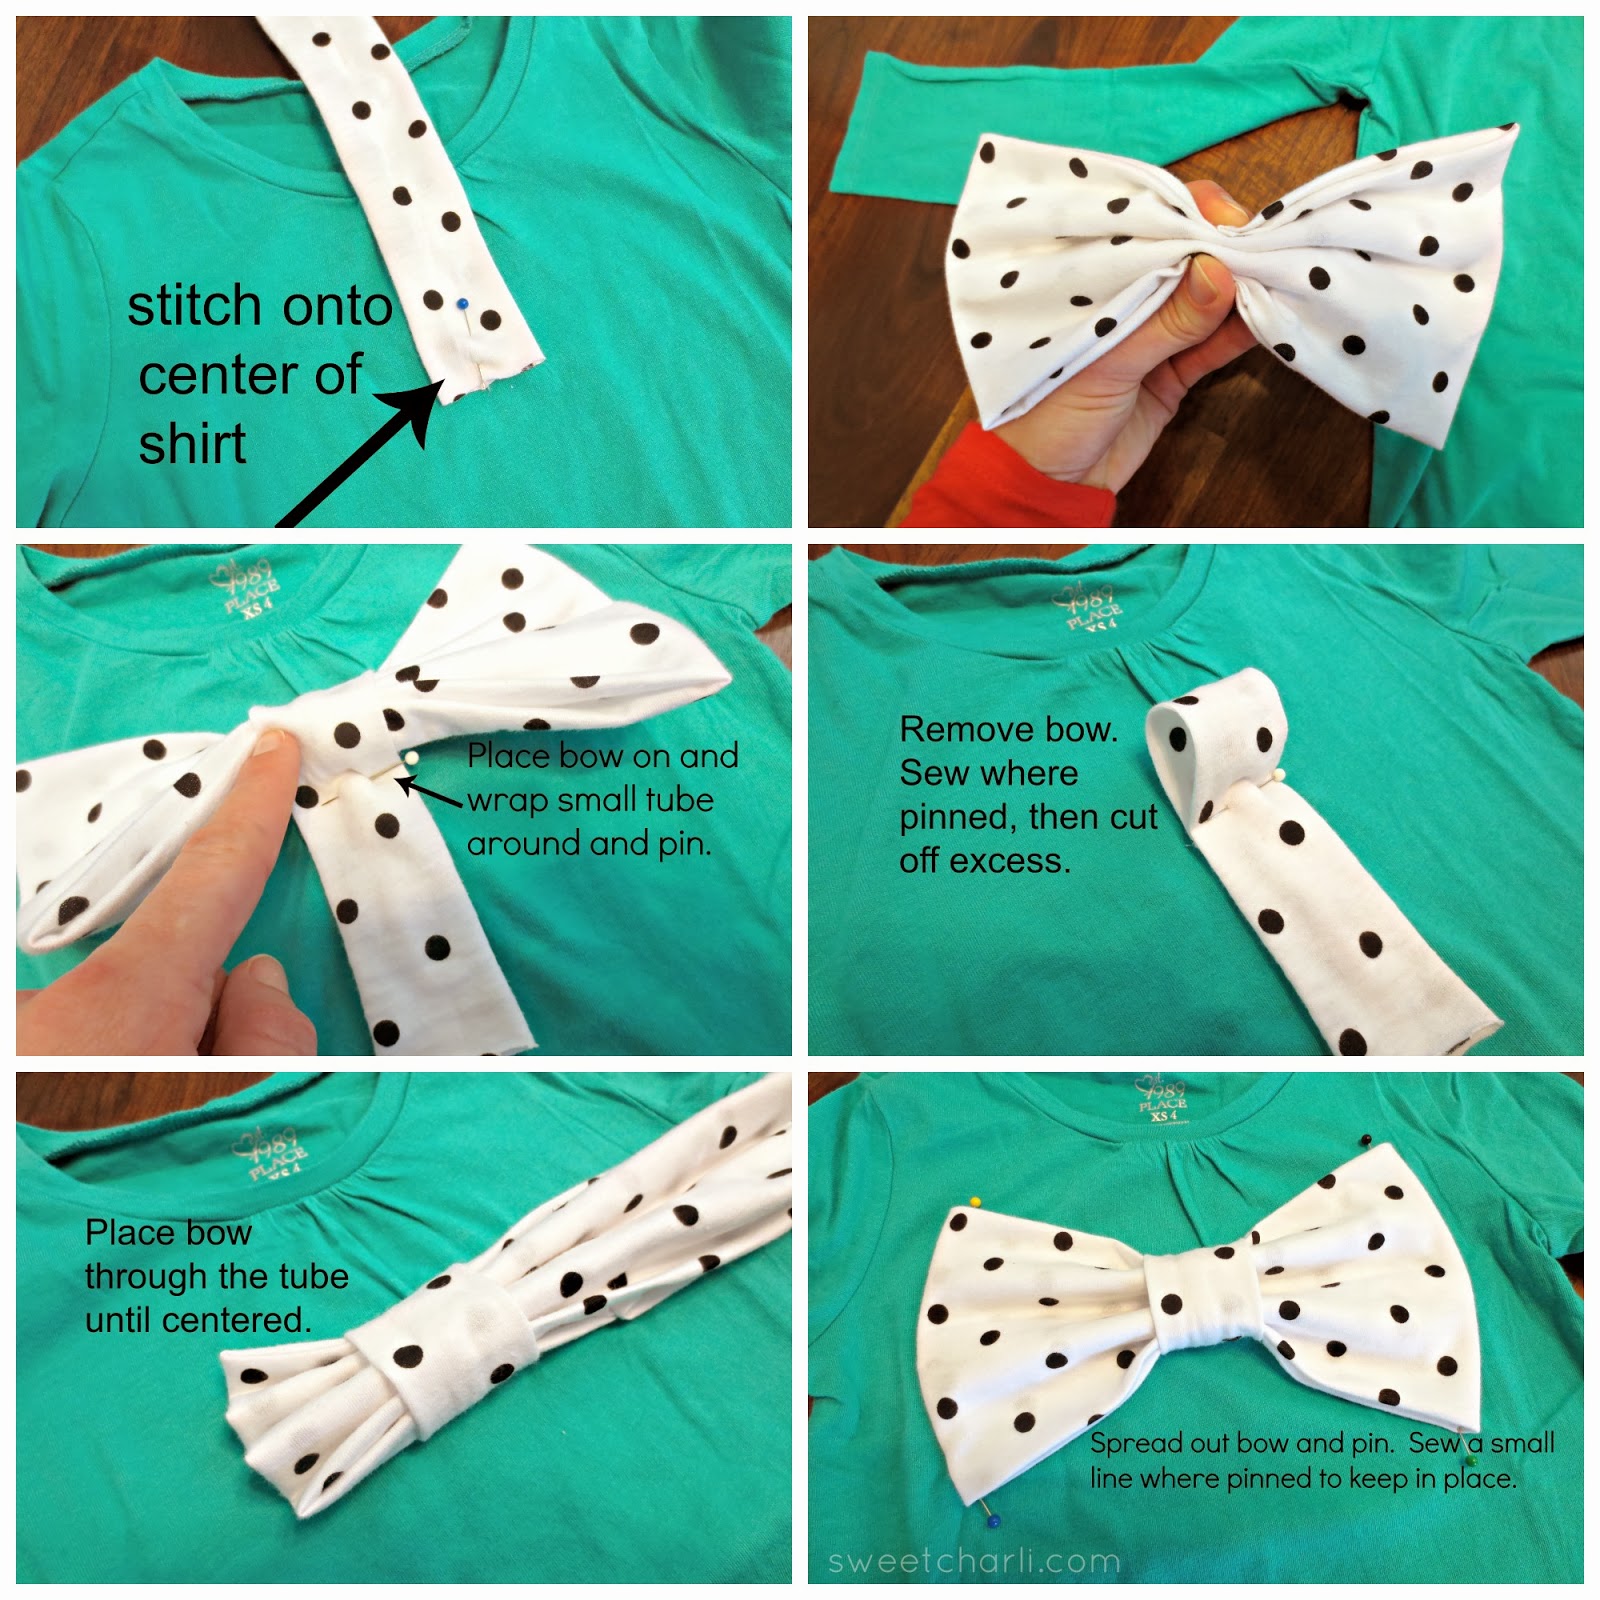
Finally, you will simply make your bow again by folding it and slip it through the hole you just made with your tube piece. Pin on the four corners and make small stitches to keep it in place where you feel it is needed.
And there you have it, a cute little bow shirt!

Check out the fun BOW rings I made HERE