

I have recently been working with The Ribbon Retreat on creating ideas made from the awesome selection of ribbon that they have. My latest creation are these ruffled ribbon bracelets.
I love these because they are something you can make
with or without a sewing machine. They are something you can make with the ‘crafty’ and even the non-crafty.
If you are looking for a fun craft to make with a group of girls, this is it. If you are looking to make something for girlfriend gifts, this is it.

I made a variety of bracelets using different ribbons from The Ribbon Retreat. The ruffled ribbon is especially my favorite at the moment.
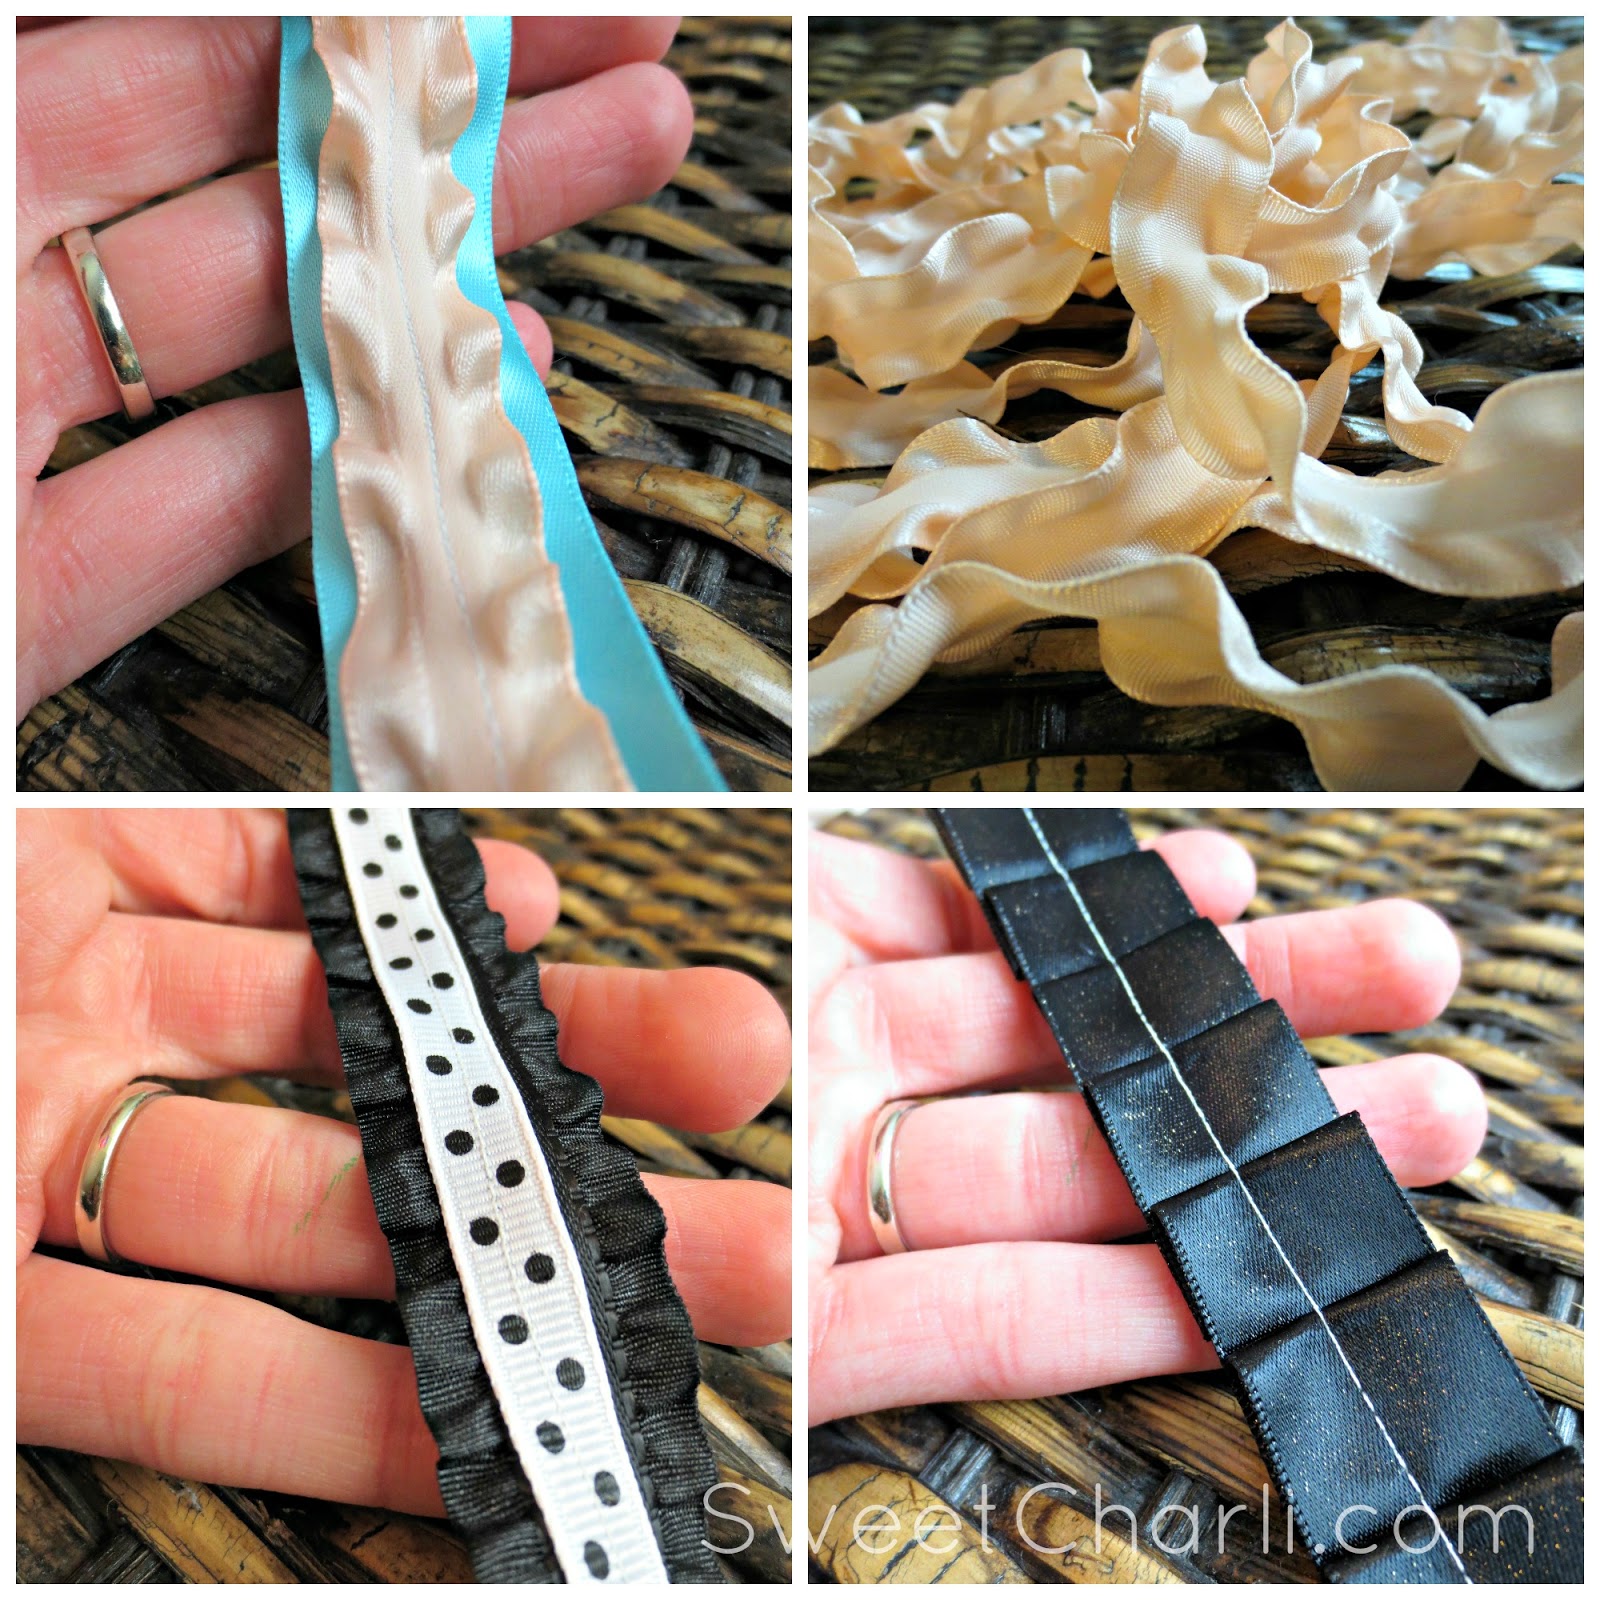
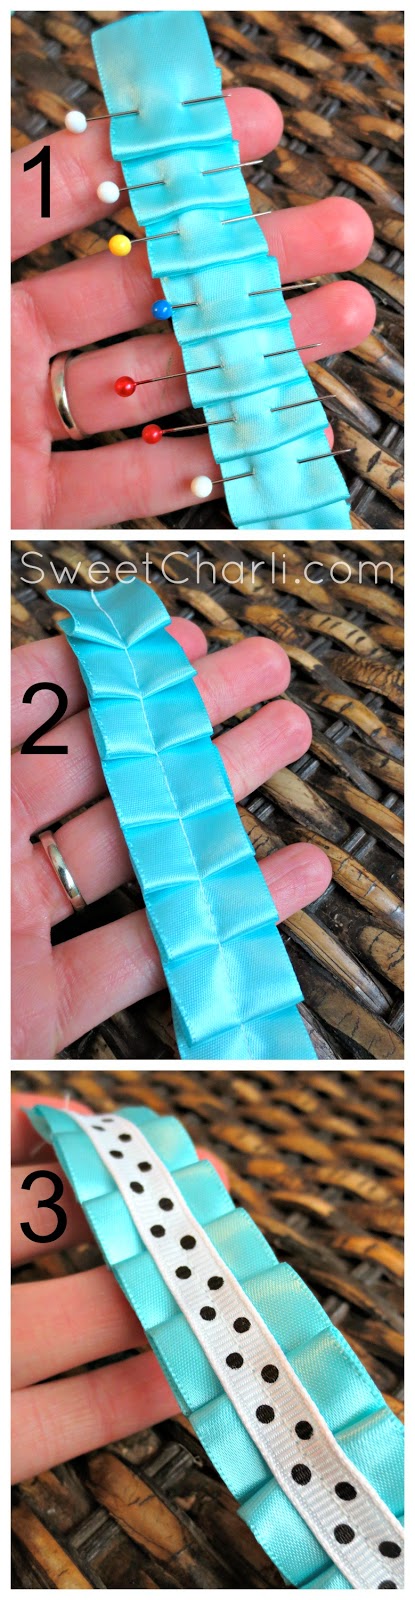
Tiffany blue is currently my favorite color. I used satin ribbon and created my own ruffle in the picture below. Here are the instructions:
(1) Ruffle the ribbon and pin. Ruffle it to measure around 3/4 of your wrist. (you will use elastic for the rest)
(2) Sew a straight stitch down the middle of the ribbon.
(3) Cover with a smaller ribbon and stitch down the middle (or glue!)
To finish off the edges, singe them with a lighter to keep from fraying.
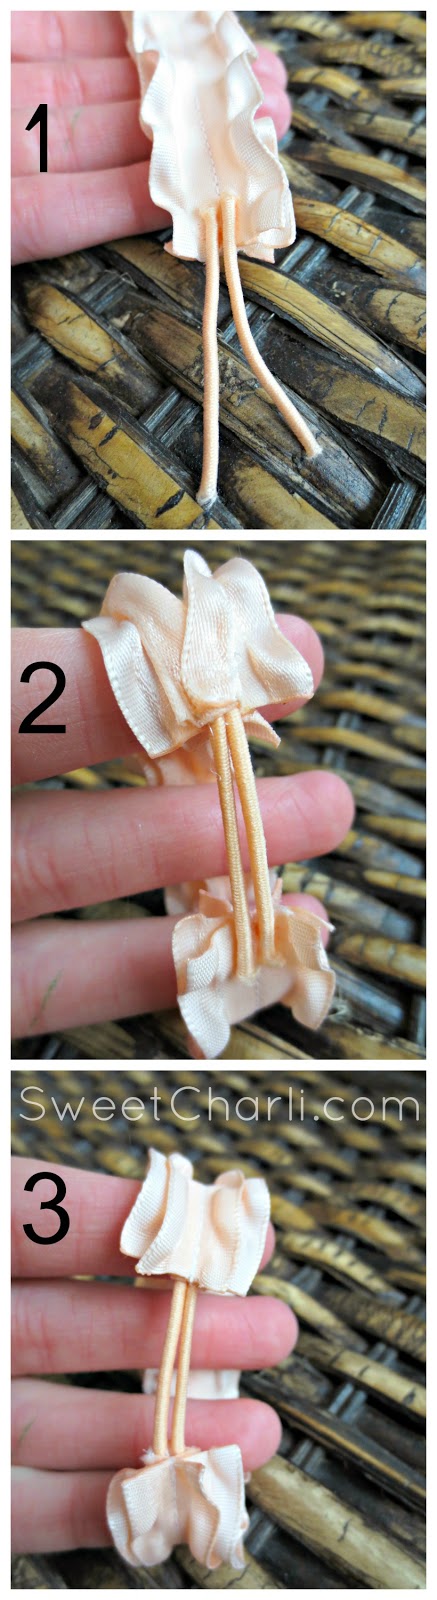
Here is the part where you get to customize the fit – and guess what…you can use a hair elastic! Yep, it’s so easy. Just take a hair elastic and cut it so you have two pieces.
(1) Hot glue two ends to the inside of the bracelet (the part that will touch your skin.) Then wrap the ribbon around your wrist to see how long the elastics need to be so that you can fit it over your wrist with the stretch. Cut the elastics.
(2) Hot glue the other two ends to the other end of your ribbon so that you now have a circle.
Put a dab of hot glue on the elastics then fold over the edges of the ribbon so that the elastics are now sandwiched in between the ribbon.
(3) Then you will turn the bracelet right side out!
You can embellish these with endless possibilities! I used these bows on mine but you can do jewels, beads, pearls, glitter, etc!
That’s it! It is very easy and can get very addicting because of all the colors and types of ribbon you can use! If you liked this tutorial be sure to check out my ribbon bow tutorial HERE!

